- May 26, 2022
- Posted by: Alec McDaniel
- Categories: How-To, Training

Environment Variables, found in Power Platform Solutions, allow you to easily change key values when deploying solutions between different Power Platform Environments.
The process to use these environmental variables with actions in Power Automate flows is straight forward.
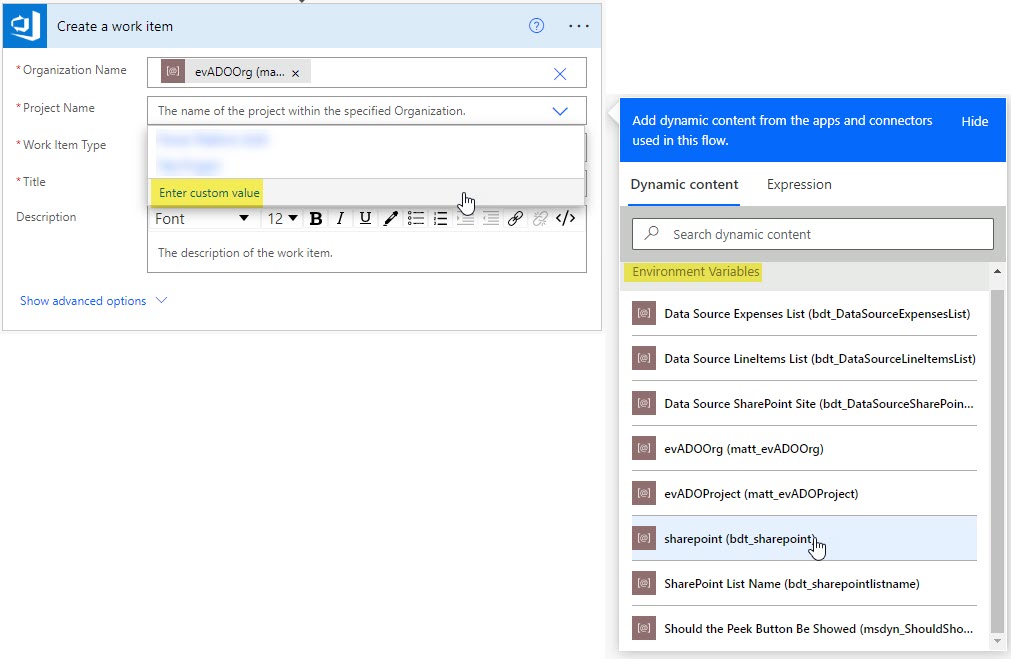
- Click on the input field.
- Select an environment variable from the dynamic content menu that appears or sometimes you must first click on “Custom Value”, then click on your environmental variable from the dynamic content menu that appears.
You may have noticed that in the case of using Azure DevOps Trigger actions, and maybe others, the dynamic menu never appears when following the steps listed above.
As you can see here below, this is the experience you would normally have.
As you can see in this video below, on an Azure DevOps trigger, when you click on Custom Value, no dynamic menu appears from which you would select your environmental variable.
Are you out of luck when it comes to avoiding the manual step of updating these flows after deployment? The answer is “not completely.”
In this post, I will show you how you can input references to your environment variables in some but not all the trigger input fields.
For the life of me, I could not get this method to work for the Organization Name field in the TRIGGER, but for the Project Name field, it worked great.
Note: It does appear that you can use an environmental variable with the Organization Name in an Azure DevOps ACTION, just not the trigger.
What do you need for this example.
- A Power Platform Solution
- One or more Environmental Variables
- A Power Automate Flow Created inside of the Solution
- Notepad or a Code Editor
The first step is to add an action after the trigger and select your environment variable or variables using the normal method.
Next, click the three-dot ellipsis in the upper right-hand corner of the action and select “Peek code”
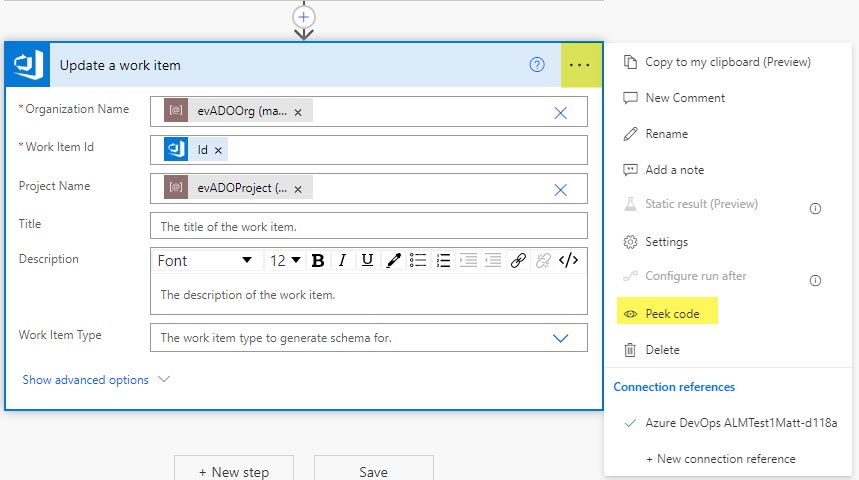
Locate the “parameters” code block and copy the references to your environmental variables.
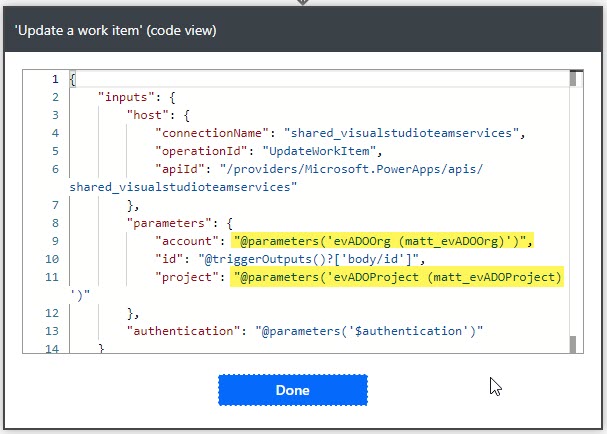
Open Notepad and paste the copied code. Then perform the following modifications :
- Add a blank space before the opening @ symbol.
- Add an opening bracket after the @ symbol and a closing bracket right before the ending quotes. (These changes have been highlighted in yellow below) .
This…
@parameters(‘evADOOrg (matt_evADOOrg)’)
@parameters(‘evADOProject (matt_evADOProject)’)
Changes to this…
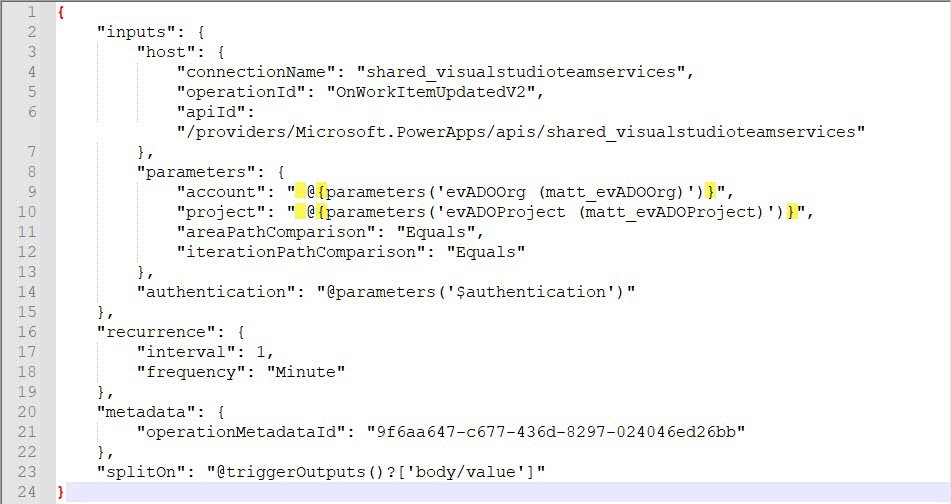
@{parameters(‘evADOOrg (matt_evADOOrg)’)}
@{parameters(‘evADOProject (matt_evADOProject)’)}
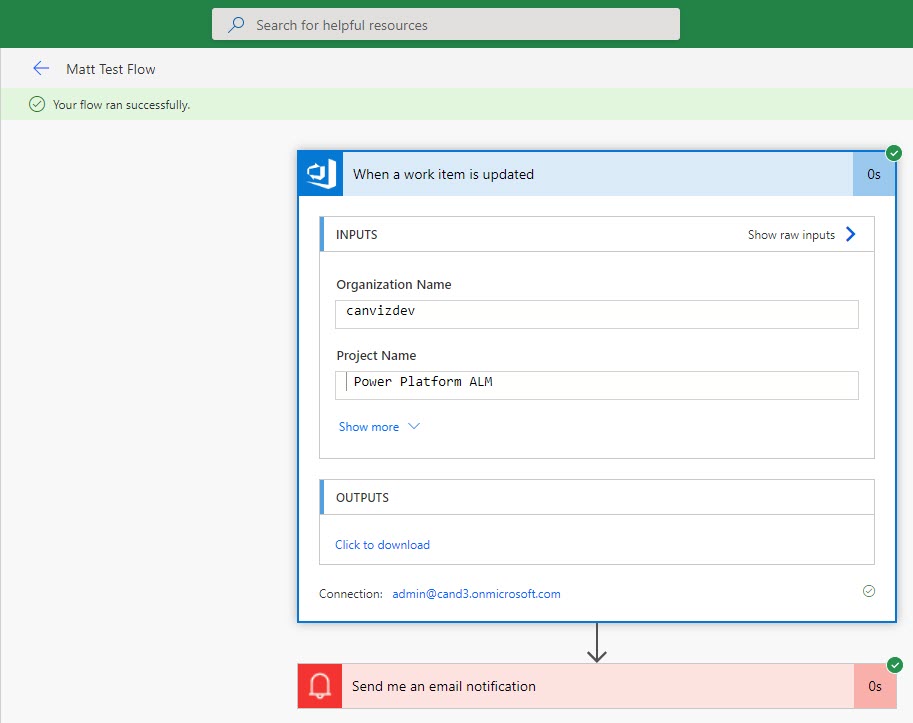
Return to the flow editor, edit the trigger, select the Project Name, and click Custom Value. Then paste the modified reference to your environmental variable and click save.
Note: Make sure the leading blank space stays, otherwise you will get a double @@ reference when you peek at the code, and it will not work!

Test your flow for success and verify that the correct references were used.
That completes the instructions. Feel free to use this pattern with other triggers or actions that may not display the dynamic content panel in your flow editor. I cannot guarantee that it will work everywhere, like in my case with the ADO Organization Field of Trigger Action, but you may have better luck elsewhere. Thank you for reading and if you have any questions, please feel free to reach out to me or Canviz and be sure to leave a comment below.